- Products

- Developers
- User stories
- Blog
- Pricing

Writing a GraphQL service using Kotlin and Spring Boot
Learn how to build a GraphQL service from scratch, setting up Spring Boot and working with a data access layer. The end result will be a family tree API.
Introduction
GraphQL is a modern alternative to REST for writing web-based APIs, allowing for the server to expose a schema describing the entire graph of data, and for the client query against that schema. GraphQL allows for much richer data to be obtained with less overhead, due to needing fewer requests and no need for returning undesired fields.
Kotlin is a modern language that executes on the JVM, and while it has gotten a lot of press recently for use in Android development it has a huge amount of potential for server-based development as well. It has recently been blessed for use in Spring 5. However, it works incredibly well in Spring 4 already. Kotlin can be useful to make our applications significantly easier to develop and understand and to remove a number of potential sources of bugs.
This article will show how to build a GraphQL Service from scratch, including setting up Spring Boot and working with a data access layer. The database will be entirely abstracted for purposes of this article, but plugging into a real data store can be easily achieved.
The end result of this will be a simple family tree API, allowing us to get details of people and follow links from one person to another.
Prerequisites
This article assumes that you already have some knowledge of the Kotlin programming language and the GraphQL API system. You can learn more about these at their appropriate websites if you do not already know them.
In order to follow the article, you will need to have a recent JDK installed, and a recent version of Maven. Everything else will be handled as we work through the article.
GraphQL Support in Spring Boot
GraphQL can be supported in Spring Boot by use of the graphql-spring-boot-starter working in conjunction with the graphql-java-tools module. In addition, there is a graphiql-spring-boot-starter that can be included to give access to the GraphiQL tool built directly into our application. This is a fantastic way of testing our API when it is running.
The graphql-java-tools module allows us to write our GraphQL schema in schema files, and then connect it to Java classes—written in Kotlin here—to actually represent the data objects and to provide values to them. The graphql-spring-boot-starter does all of the work to automatically configure everything and ensure that it works as desired.
GraphQL Java Tools expects that we will have special resolver classes registered in the Spring context that do the majority of the work. These come in a number of forms:
- GraphQLQueryResolver – classes implementing this interface are responsible for the root query fields
- GraphQLMutationResolver – classes implementing this interface are responsible for the root mutation fields GraphQLResolver – classes implementing this interface are responsible for resolving complex fields on a specific type
All types in the GraphQL Schema correspond to a class in the Java runtime. Their needs are no connection between the Java class name and the GraphQL type, but the same class must always be used for the same type. Classes are determined automatically at startup by introspecting the various resolvers to see what is returned.
Any time a Java class used to represent a GraphQL type has a method with a name matching a field on the type, this can be used to return the value for that field. The rules for this are:
<fieldName>- is
<fieldName>– only for boolean fields - get
<fieldName>
If the GraphQL field takes any parameters then these will be provided, and the method must expect them.
If the field is more complex, a resolver can be written instead. This always has a class name matching the Java bean, with the suffix Resolver, and the method rules are exactly the same as above, except that the method will always take the Java bean as a first parameter.
For example, if we have a GraphQL type as follows:
1type Person { 2 id: ID! 3 name: String! 4 relatedTo: [Relatonship]! 5 }
we could have a Java type:
1data class Person(val id: String, val name: String)
and a Resolver class:
1class PersonResolver : GraphQLResolver<Person> { 2 fun getRelatedTo(person: Person) : List<Relationship> 3 }
Setting up the build
The easiest way to get started on a new Spring Boot project is to use the Spring Initializr. This is a simple form that you can fill out and then download a fully working Spring Boot project. We can get our initial build working by filling out the form as follows:
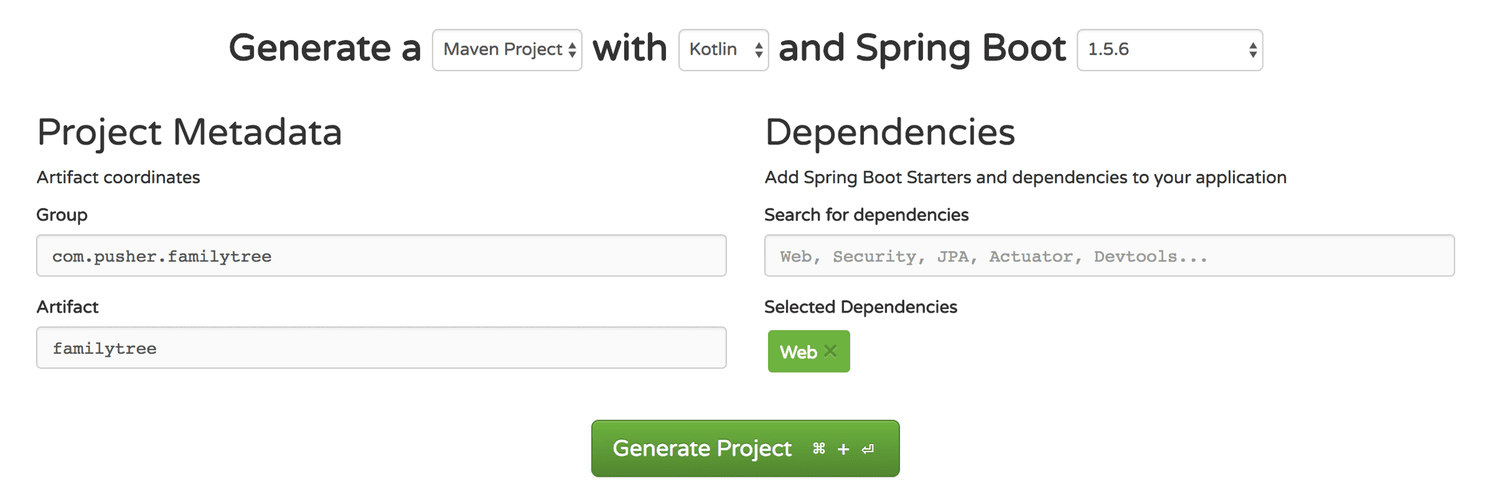
This will then give us a Maven project set up with:
- Spring Boot 1.5.6
- Spring 4.3.10
- Kotlin 1.1.4
- Embedded Tomcat 8.5.16
We can then build the application by executing mvn clean install, and start a development version using mvn spring-boot:run.
Adding GraphQL to the build
Adding GraphQL to the build is as simple as adding the appropriate dependencies, as follows:
1<dependency> 2 <groupId>com.graphql-java</groupId> 3 <artifactId>graphiql-spring-boot-starter</artifactId> 4 <version>3.6.0</version> 5 </dependency> 6 <dependency> 7 <groupId>com.graphql-java</groupId> 8 <artifactId>graphql-java-tools</artifactId> 9 <version>4.0.0</version> 10 </dependency> 11 <dependency> 12 <groupId>com.graphql-java</groupId> 13 <artifactId>graphql-spring-boot-starter</artifactId> 14 <version>3.6.0</version> 15 </dependency>
These three dependencies give us everything that we need to not only get GraphQL available in our application but also to serve GraphiQL to test it.
This will by default host the GraphQL API on the /graphql endpoint, and accept POST requests to it. This can be changed in *application.properties**,* but if you do so, then GraphiQL will no longer work with it.
Writing our initial schema
At this point, nothing has actually happened. We need to write our schema before any actual functionality changes happen.
Schemas are written in .graphqls files and can be anywhere on the classpath. There can be as many of these as we like, so we can easily split our schema into functional areas if we like. The most recent version of GraphQL Java Tools also supports the extend type **syntax so that we can split the root Query and Mutation types across files as well.
Initially, we are going to write a trivial schema to ensure that everything works correctly. As such, we will write a file src/main/resources/graphql/familytree.graphqls that looks as follows:
1type Query { 2 # The API Version 3 version: String! 4 }
Writing our initial Query Resolver
We now need to have a Query Resolver to power this. Until this turns up in the Spring context, no GraphQL functionality is enabled. Once we have this then everything else starts working.
For this field, we simply need a class as follows:
1@Component 2 class Query : GraphQLQueryResolver { 3 fun version() = "1.0.0" 4 }
The version() method directly corresponds to the same field in the GraphQL Schema.
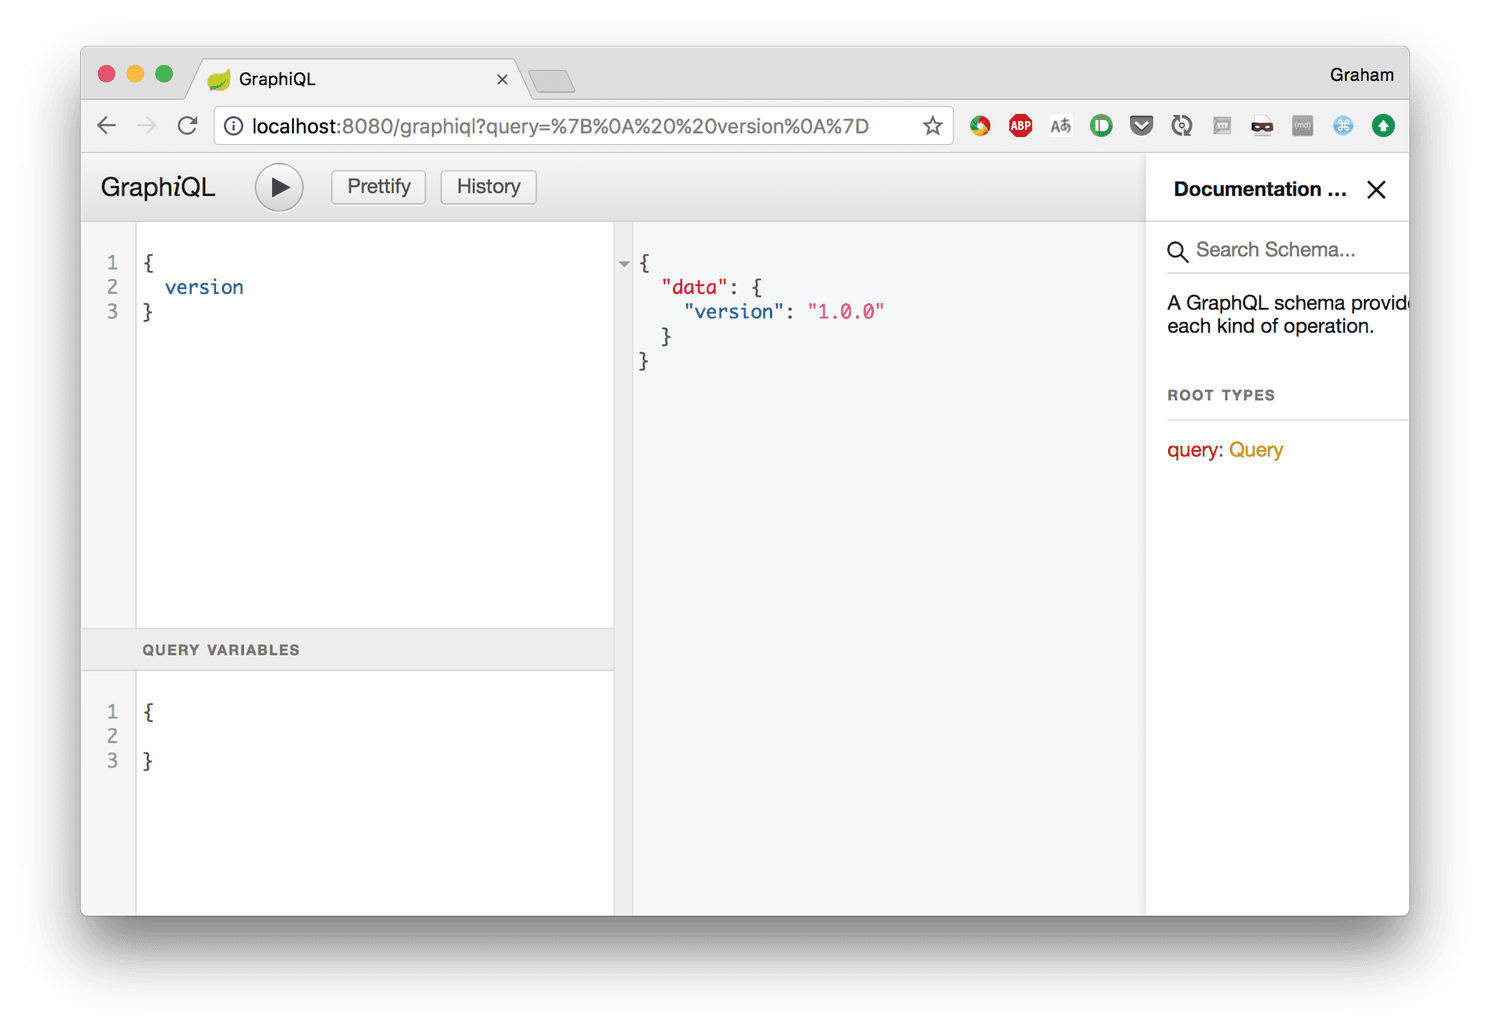
We can now try this out in GraphQL by starting our service – mvn spring-boot:run – and visiting http://localhost:8080/graphiql. If you try the following query:
1{ 2 version 3 }
You should see something like this:
Looking up People
Now that we have a working GraphQL API, we can do something more interesting. The first part of our family tree is to be able to retrieve a single person by their ID.
Firstly, we need to represent a Person in our system. The Kotlin class for this will be as follows:
1data class Person( 2 val id: String, 3 val name: String 4 )
This is just a simple data class that gives us an ID and a name.
Next, we need to be able to load these. We are going to use a hard-coded DAO layer instead of a real database for simplicity’s sake. This will look as follows:
1@Component 2 class PersonDao { 3 private val data = mutableListOf( 4 Person(id = "qeii", name = "Queen Elizabeth II"), 5 Person(id = "pp", name = "Prince Philip"), 6 Person(id = "pc", name = "Prince Charles"), 7 Person(id = "pw", name = "Prince William") 8 ) 9 10 fun getPersonById(id: String) = data.firstOrNull { person -> person.id == id } 11 }
This gives some hard-coded data – taken from the British Royal Family – and a simple method to get one of these by ID.
We then need to wire this up to the GraphQL API. For this, we need a schema definition. This can go in the existing file or a new one:
1type Person { 2 id: ID! 3 name: String! 4 } 5 6 extend type Query { 7 getPersonById(id: ID!) : Person 8 }
We then need a Query resolver to load the person from the DAO:
1@Component 2 class PersonQueryResolver( 3 private val personDao : PersonDao 4 ) : GraphQLQueryResolver { 5 fun getPersonById(id: String) = personDao.getPersonById(id) 6 }
This is then everything needed to support this field. This time we can try this query:
1{ 2 getPersonById(id:"qeii") { 3 name 4 } 5 }
to get this result:
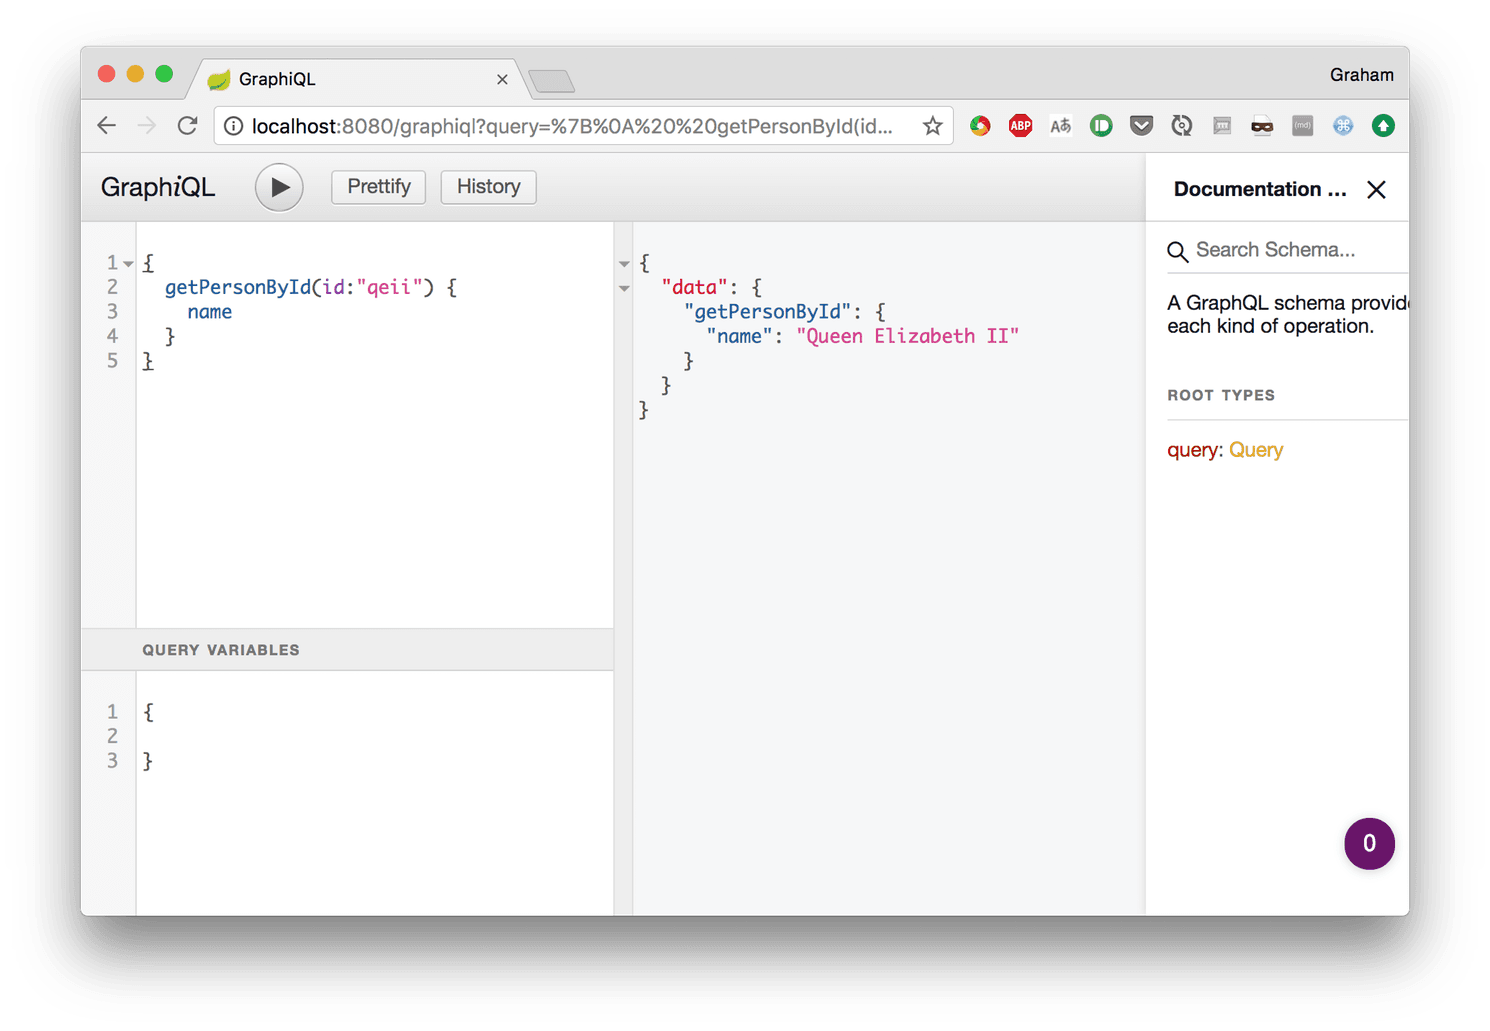
Note how we’re asking for a single field from a single record, and that is all that we are getting back from the server. Even though our code always returns the entire record, the GraphQL Service only returns the exact data that was requested.
Relationships Between People
The final part of our API is to be able to see who is related to whom. This will be done using another DAO and Model class for simplicity.
Our model class will be as follows:
1data class Relationship( 2 val from: String, 3 val to: String, 4 val relationship: String 5 )
We are going to assume that any relationship is between exactly two people, and is of a specific type – e.g. PARENT, SPOUSE, etc.
Our DAO for this will be similar to before, with some hard-coded data:
1@Component 2 class RelationshipDao { 3 private val data = mutableListOf( 4 Relationship(from = "qeii", to = "pp", relationship = "SPOUSE"), 5 Relationship(from = "pp", to = "qeii", relationship = "SPOUSE"), 6 Relationship(from = "qeii", to = "pc", relationship = "PARENT"), 7 Relationship(from = "pp", to = "pc", relationship = "PARENT"), 8 Relationship(from = "pc", to = "pw", relationship = "PARENT") 9 ) 10 11 fun getRelationshipsFromPerson(personId: String) = 12 data.filter { relationship -> relationship.from == personId } 13 14 fun getRelationshipsOfTypeFromPerson(personId: String, type: String) = 15 data.filter { relationship -> relationship.from == personId } 16 .filter { relationship -> relationship.relationship == type } 17 }
Again, we have some hard-coded data that corresponds with our people records, and a couple of methods to access this data.
We can now update our schema to work with this data:
1type Person { 2 id: ID! 3 name: String! 4 relationships(type: String): [Relationship]! 5 } 6 7 type Relationship { 8 from: Person! 9 to: Person! 10 relationship: String! 11 }
This lets us go from a person to their relationships, and then from a relationship to the people involved.
Finally, we need some resolvers. There will be two of these. Firstly, for resolving the Relationship from the Person record:
1@Component 2 class PersonResolver(private val relationshipDao: RelationshipDao) : GraphQLResolver<Person> { 3 fun relationships(person: Person, type: String?) = 4 when (type) { 5 null -> relationshipDao.getRelationshipsFromPerson(person.id) 6 else -> relationshipDao.getRelationshipsOfTypeFromPerson(person.id, type) 7 } 8 }
And then for resolving the Person from either side of a Relationship record:
1@Component 2 class RelationshipResolver(private val personDao: PersonDao) : GraphQLResolver<Relationship> { 3 fun getFrom(relationship: Relationship) = personDao.getPersonById(relationship.from) 4 fun getTo(relationship: Relationship) = personDao.getPersonById(relationship.to) 5 }
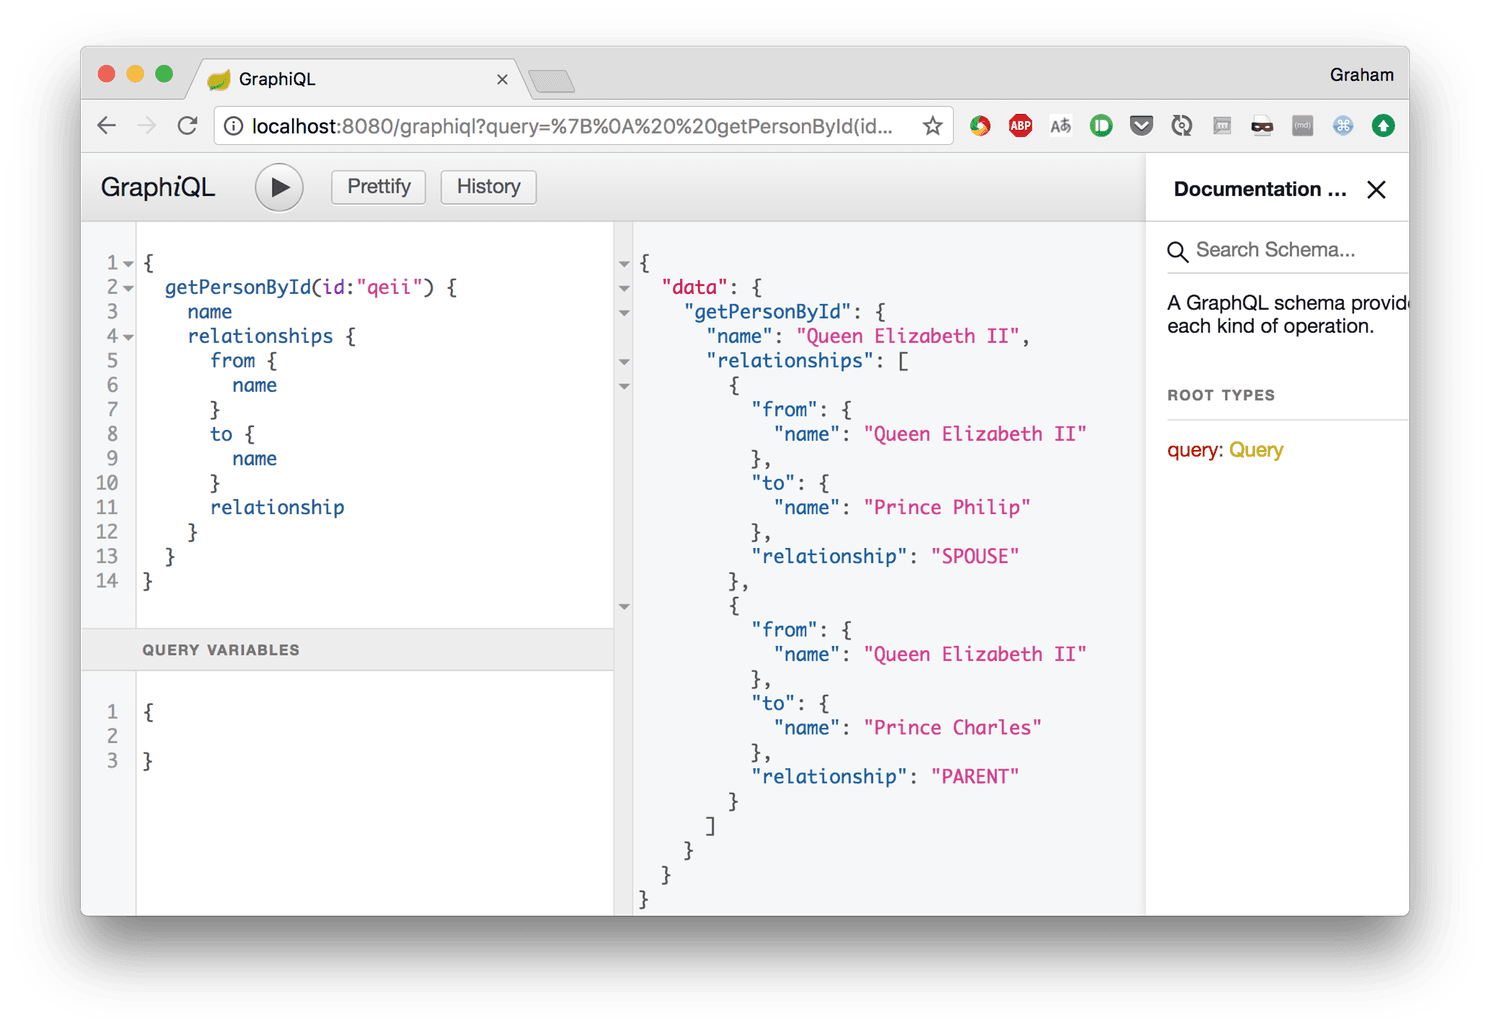
We can then see this in action by looking up the relationships of one of our people, using this query:
1{ 2 getPersonById(id:"qeii") { 3 name 4 relationships { 5 from { 6 name 7 } 8 to { 9 name 10 } 11 relationship 12 } 13 } 14 }
And we will see this result:
Or, if we want something a bit more targeted, we can write a query that only selects one type of relationship:
1{ 2 getPersonById(id:"qeii") { 3 name 4 relationships(type:"SPOUSE") { 5 from { 6 name 7 } 8 to { 9 name 10 } 11 relationship 12 } 13 } 14 }
And get this as the result:

Adding Mutations
So far we have only concentrated on reading data from the system. We can also add and change data in the system just as easily.
GraphQL uses the concept of Mutations for anything that will cause data to change. In reality, there is no difference in how queries and mutations work from the point of view of the code. However, by convention, a Query should never cause data to change whereas it is expected that a Mutation will always do so.
For our example, we will allow for API callers to create new people in our data store.
Firstly, we need to support this in our PersonDao class:
1fun createPerson(name: String): Person { 2 val person = Person(id = UUID.randomUUID().toString(), name = name) 3 data.add(person) 4 return person 5 }
We then need to add a Mutation to our schema. Because we don’t already have one to extend we’ll write it new here:
1type Mutation { 2 createPerson(name: String!) : Person! 3 }
And finally we need a resolver:
1@Component 2 class PersonMutationResolver(private val personDao: PersonDao) : GraphQLMutationResolver { 3 fun createPerson(name: String) = personDao.createPerson(name) 4 }
That’s everything we need. We can execute this mutation to create a new person in our service:
1mutation { 2 createPerson(name:"Princess Anne") { 3 id 4 name 5 relationships { 6 relationship 7 } 8 } 9 }
and we will see this response.
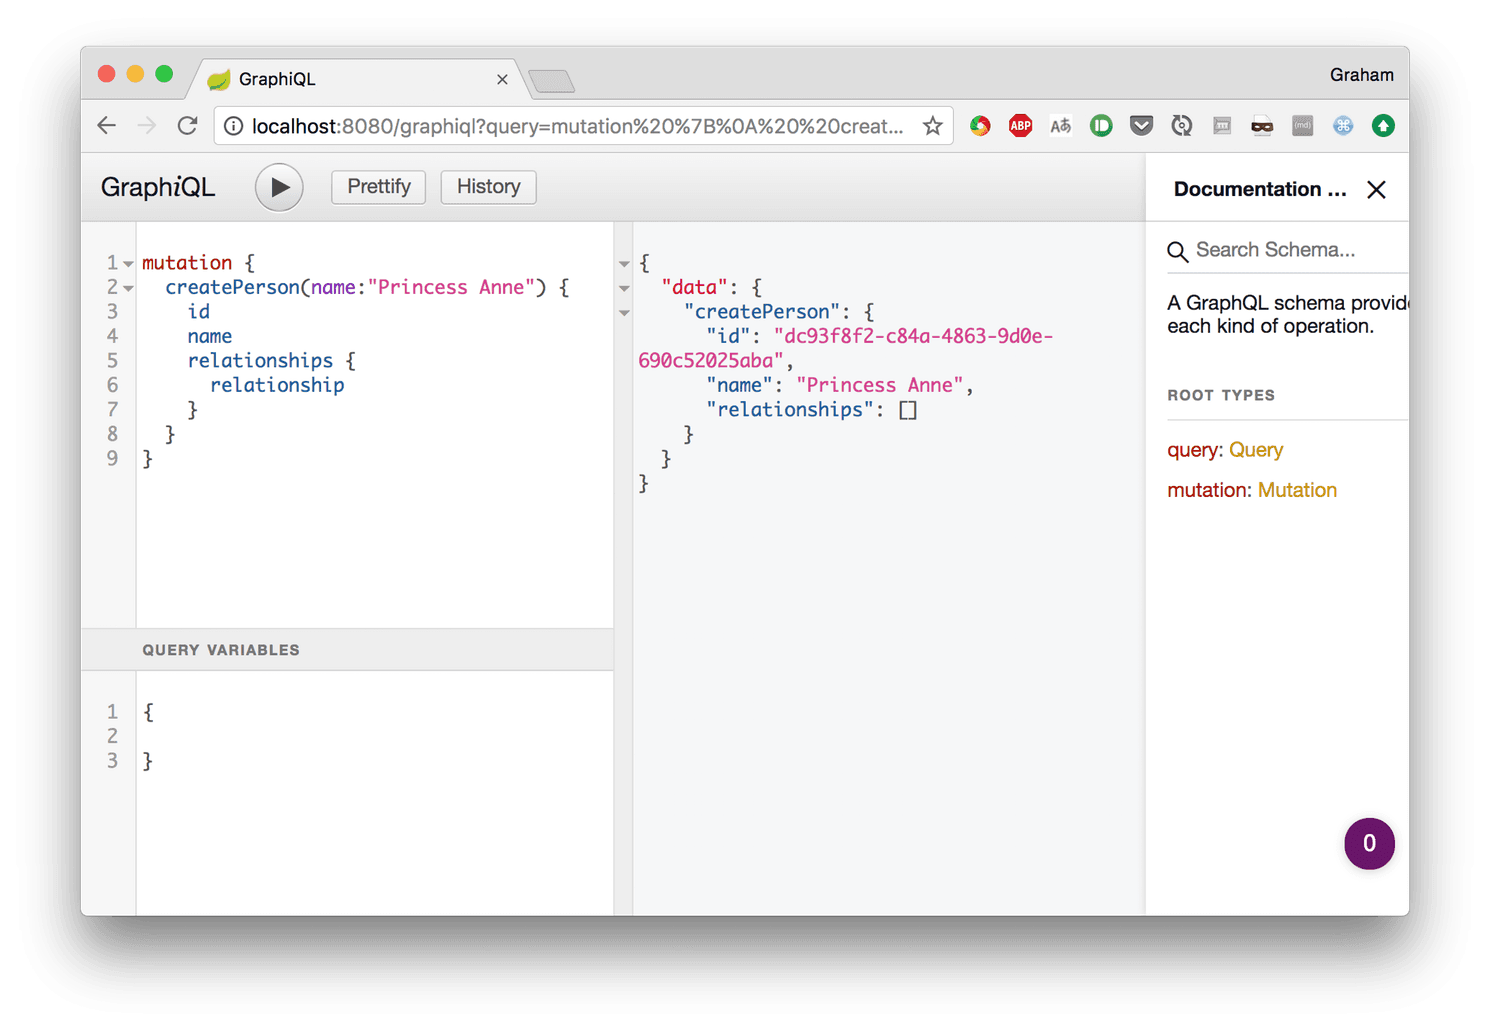
Notice that we can access the complete graph from the brand new Person object purely on the return value from the mutation. This means that we could potentially create a Person with a relationship already in place, and navigate this without needing to make an additional request.
Summary
GraphQL is a powerful alternative to REST for writing APIs. Adding support for it into a Spring Boot application is a very simple prospect, and the libraries work seamlessly with the Kotlin language to make writing our code a very simple affair.
The full source code for this example can be downloaded from GitHub, or you can write your own.


© 2024 Pusher Ltd. All rights reserved.
Pusher Limited is a company registered in England and Wales (No. 07489873) whose registered office is at MessageBird UK Limited, 3 More London Riverside, 4th Floor, London, United Kingdom, SE1 2AQ.